Category Archives: The Garden

New residents!

Although these guys (canadian geese) are actually regular and they come back every year.

The first year we were here, they were only two and they successfully raised a chick (they used to go for morning walks in the field opposite, saw them most mornings on my way out to work ๐Ÿ™‚ ), then last year three came back to the pond, I’m assuming it was mum, dad and offspring not quite yet old enough to be on his own…? And this year I think I counted five!

These two are obviously keen for some more privacy and have moved to the new pond across the drive ๐Ÿ™‚ โค

pair of canadian geese in garden april 17

I also spotted ducks, who were there last year but only two of them, a pair. This year we had three to start with (two males and a female) and now another female has joined them, so two pairs! Hopefully lots of ducklings, I’ll try to take some pictures…

Oh, AND the woodpecker was spotted twice over the last couple of weeks, after a few weeks of no sighting, so he/she is definitely still around! Will also try to take another shot. It always goes for fat balls in the bird feeder so will keep putting them out through the summer, keep crows and magpies away, and hopefully he/she will bring his/her chicks!

Exciting times, I ๐Ÿ’š spring!!ย โ˜€ย ๐ŸŒฑย ๐Ÿฅ

Brox

PS: and lots of babyย ๐Ÿ‘ every where as well, so cute! Considering getting a pet sheep ๐Ÿ˜€

The system works!

A bit of background, there was an abandoned foot/boot tray in the garden (maybe not the official term, the kind of tray used to clean boots/wellies on farms) which had collected rainwater, dead leaves, etc. and kind of looked like a little pond (despite being very shallow).

I know insects are attracted by it and I seem to remember having seen a bird drinking from it. Having found a couple of frogs and toads under the vegetation by the hedge lineย a few meters away, I thought that maybe these lovely creatures would appreciate an area of still shallow water that they could use for whatever purpose. So I “decorated” this little tray by putting stones around it, letting the grass grow around and gracefully placing a few stones and branches in and across to act as islands and bridges.

My other half, despite finding the whole thing amusing, actually helped with dressing the pond (now officially the “frog pond”), but never really believed it would ever work. As a matter of fact, since last spring, as far as we are aware, one frog was spotted swimming in it… and also our dog who likes to use it in the summer to cool down in between chasing balls and sticks…!

No need to say I had slightly given up on the idea that I had created some sort of amphibian all star resort… until yesterday morning, when walking past I spotted something in the middle of it that definitely wasn’t there last time.ย It rained a lot the day before (and I mean a lot)ย which is maybe what triggered the animal(s) to lay, I don’t know. But all I really care about right now is that my pond is being put to good use by those it was created for! Can’t wait for spring ๐Ÿ˜€ ๐Ÿ˜€

Brox

img_1539

2 weeks on, the embryo in each egg has substantially grown in size, and is also starting to change shape, to become longer with discernible head and tail ends …!!

Exciting!!


And another week or so later, we have… tadpoles!

They’re really starting to take shape now, much longer with a more define head (and eyes!), they are swimming outside the egg for most of them, although all the eggs have now more or less combined into this jelly like mass…


I asked my friend, who knows most things about living things, and is really into conservation, whether I should give Nature a helping hand and put a little net to cover the pond and stop birds from eating the little fellas. She said not to, some will be eaten by water beetles, others by dragonfly larvae, others by the others (yes, they are cannibals :s ), and the rest will survive to replace their parents…

Just as Nature intended, She knows best!


A month on, the little fellas are clearly developing into amphibians. Their head definitely resembles more that of a frog and not of a fish anymore… Their belly area is a lot more bulgy. Some have grown quite a lot in size. They are still feeding of plant debris, although some should soon start developing teeth… ! ๐Ÿ™‚ ๐Ÿ™‚ ๐Ÿ™‚

Gardening and PPE

PPE as we know stands for Personal Protective Equipment, and in this instance doesn’t necessarily mean hi-viz jackets, hard hats and steel-toe caps.

Nothing more in fact than a good pair of preferably long gardening gloves. You would wear them of course if you were pulling brambles of nettles, or cutting roses, basically working with anything vegetal having the potential to sting you, cut you, scratch you and so on…

Well I would strongly suggest you wear them all the time, when doing any type of gardening, even if just picking your lettuce, especially – especially – if it is very sunny!

As it turned out, the day after I picked my vegetables, I noticed some red patches on my forearms. Didn’t think much of it as I had been working withย nettles, until it started blistering that same evening. And the blisters got worse by the next day, were sore, swollen, more came out… So went to the doctor’s as you do, and I have what’s called strimmer’s disease or phytophotodermatitis (also known as parsnip burn, which is what caused my reaction). Other plants and fruits such as carrots, celery, parsley, wild parsnip, wild carrot, giant hogweed, limes and figs are also known to trigger the reaction.

Mine is quite bad, nothing that a good dose of strong steroid cream will not sort, but still it’s not pleasant!! And very unsightly.

So if you’re going to be in a garden for some time and it’s sunny, forget about your looks and your tan (๐Ÿ˜ณ), think about your skin and protect your hands.

In short, wear gloves and maybe even long sleeves.

You learn something new everyday ๐Ÿ™‚

Brox x

Not bad for a morning’s work!

Spring onions, potatoes, the last of the lettuce (hallelujah!) and a show-winner of a courgette.

Probably another courgette to pick in a day or two (and more to follow), some of the peas are nearly ready too ๐Ÿ™‚

I’ll plant another rowย of potatoes before the end of the week, and hopefully another one in 2-3 weeks time, weather dependent.

The parsnips are doing well, and the only spinach plant left still manages a few leaves.

Huge improvement on last year’s crop, fairly happy with that, can’t wait for dinner!

Brox

Surplus rocket and what on earth to do with it

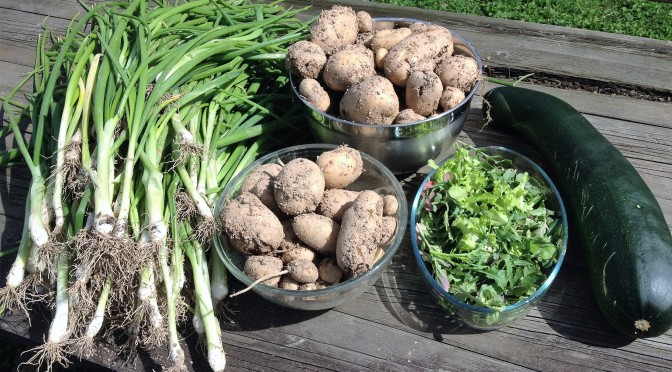
So if, like me, you were pretty keen on starting your vegetable garden, but sensibly only planted the stuff that you’d eat, and were likely to buy the most at a supermarket, then you’d have gone for the fairly safe, easy, good-chance-of-success peas, courgettes, spuds, spinach, broccoli, onions… and salad, of course.
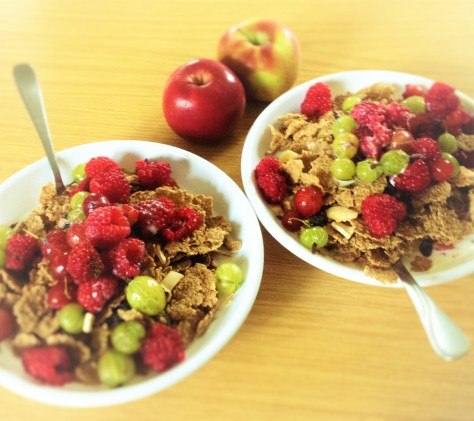
We allย know that salad grows quickly, and unlike parsnips for example or onions, which once they’re out of the ground, they’re out of the ground and you have to store/prepare them, with lettuce you are guaranteed a continuously fresh supply throughout the whole summer. And let’s face it, you don’t really eat that many potatoes and parsnips in summer do you? Nothing better than a good homegrown garden salad. Refreshing, healthy, low calorie, versatile… And so good in sandwiches, yes it is!

What most peopleย don’t realiseย (because you have to see it to believe it) is in which quantity the stuff grows. The incredible volume of leaves that those little plants can produce. In such a short amount of time. And because you want variety, just one type of lettuce would be boring, you tend to plant several kinds of lettuce, like six different varieties for example. And you are aware that you don’t necessarily have green fingers, so you want to maximise your chances. And so you sow the entirety of the seeds that the little bag you got from the garden centre holds. The whole several hundreds of them. “Well with a bit luck, we might have a plant or two”.

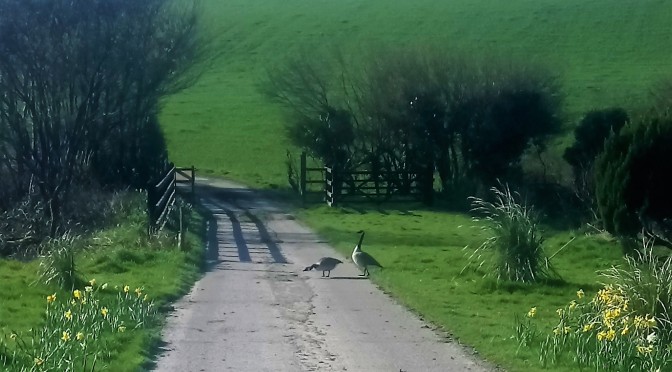
Two weeks later, you can hardly see the rest of your garden. Hopefully your lettuce bed is a bed of its own, otherwise I suggest you invest in a machete if you want to check how your runner beans are doing. And if you don’t have runner beans, I would invest in a machete nonetheless. You’ve made a few tasty dinners with your homegrown rabbit food, but everytime you cut some out, more comes. Much, much more. To the point when another couple of weeks later, your machete is blunt, you’ve had salad for breakfast, lunch and dinner, every day, your neighbours are hiding from you, in case you want to give them yet some moreย “organic produce from your garden that you grew yourself”, and you are still not making a dent into this dense forest. You are seriously considering (re-)inroducing rabbits (or, worse, slugs!) in your garden.

And then, when all hope is gone, and you’ve practicallyย turned green, the plants flower, the leaves become uneatable, and the plant slowly… well dies.

Hallelujah!

In hindsight (wonderful thing we all know), two or three rows with two to three different varieties each would have been more than enough for just the two of us. As it turns out, the horse doesn’t particularly like lettuce…

Lettuce is very satisfying to grow as a first-time veggie grower, but it is also its downside. You cannot really keep it that long, can’t freeze it… We were lucky in a way that three varieties came out first, with the spinach (also great raw in salads), we managed to get through two of them, froze the spinach. What we were left with whilst the other three were growing, was the rocket. Huge quantities of. Not my favourite but still not worth wasting.

So I searched the forums, and this lady had a great idea, make pesto with it. Eureka! Easy to make, great to store, and ideal for a quick satisfying pasta-pesto.

All you need is garlic, oil, pine nuts, parmesan and some seasoning if you like. And the green stuff (rocket in this instance, could be any kind of lettuce I guess, wild garlic, herbs…) Oh and a blender (solar powered ๐Ÿ˜€ ).

Mix it all in, give it a whiz, et voila. I then scooped the mixture into a couple of small muffin baking trays (size which I’d say makes a portion for two people), and put it in the freezer. Once frozen, I put all the individual portions into a freezer bag. Use it as and when needed.

Quick, easy, healthy, versatile… All that a salad should be… ๐Ÿ˜€

Brox x

Homegrown… can food get any better?

We all agree there is nothing like sleeping in your own bed, well there is also nothing like eating your very own homegrown, handpicked food.

So last night we had barbecued marinated wild rabbit (recipeย here, no picture sorry, too busy eating! this marinade really is yummy) with our homegrown garden saladsย (the rabbits had some too) and this morning breakfast with cereals and fresh garden berries (raspberries, red and white gooseberries). Delish!

And none of it is grown using any pesticides, herbicides, fertilizers… just a good dose of rain and sunshine,ย some elbow grease, and a real strong will to eat and live healthier.

I mean, can itย really get any better…?

lookafteryourplanetblog_berry_breakfast

Brox

DIY kitchen compost bin

This is more a “this is what you can do” as opposed to a tutorial. And also, although firstly described as an alternative to an outdoor compost for those who do not have a garden, due to its size I find it better suited as a transitional container that you keep in one place until full, and empty on the compost heap every so often; if I lived in a flat and intended to compost, I would look t build something a bit more appropriate in a wooden crate of plastic box.

DIY Kitchen Compost Bin - Tools
What you need

The list is fairly simple:

  • an empty tub of your favourite freeze dried coffee (if you work in an office they are bound to have one there)
  • glue
  • scissors
  • newspapers
  • screwdriver

All I did was lining the outside, underneath and inside (sides only) with newspapers (use glue). Inside on the bottom I left some loose bits of newspapers, so they can be changed every so often (if they soak up any liquids). I then “drill” a few holes in the lid (simply by driving the screwdriver in).

Note that I use a degradable plastic compost bag in my bin. If you don’t I would probably put more newspapers at the bottom inside and maybe use a carbon filter that you can stick on the inside of the lid if you are worried about smell.

I find this bin fit neatly in my cupboard under the sink, there is a top shelf in there,ย and this happens to go right where the sink is ๐Ÿ™‚

Take care

Brox

Pumpkin Feast

So it was Halloween not long ago, and like most people I bought a pumpkin (not yet growing my own). It was a rather large 2 or 3 kg bad boy. I never got round to the carving bit, I was more interested in what could be done with this pumpkin.

You probably already know that everything is good in a pumpkin, and that you can get quite a few tasty dishes (that one fed us for about a week!).

So about a quarter of it went into making this tasty and very simple pumpkin soup.

Homemade Pumpkin SoupHomemade Pumpkin Soup
Homemade Pumpkin Soup

Another quarter was used for this yummy pumpkin cake (literally a heart attack on the plate, but after grating all that pumpkin you will well deserve a decent portion, and probably seconds; I did!)

Yummy Pumpkin Cake
Yummy Pumpkin Cake

The other half was used between a pumpkin curry, pumpkin mash and bangers and pumpkin mash (I used potatoes in the latter, pumpkin on its own is quite watery and you don’t really get the “creamy” mash effect).

I obviously roasted the seeds (love this, and really nailed it this time, much tastier than the ones I did last year). Didn’t really follow a recipe, just washed them, then added a bit of olive oil and a pinch of salt, in the oven at very low temperature for about 1 h then under the grill until all toasted.

As I was trying to use ALL of the pumpkin, I then wondered “can the skin be eaten?”

Well it turns out that yes, you can eat the skin. Make pumpkin crisps!

Pumpkin and other squashes are great value for money, you can get so much out of it! And if you grow them yourself, they will most probably be a lot more nutritious too. I have kept a few of the biggest seeds before roasting them to plant. Homegrown pumpkin feast next year, watch this space!

More recipe ideas here ๐Ÿ™‚

Brox


We made hay!

If you were there, you would probably be as impressed as I am. A bit of background about haymaking…

First of all, I am no farmer’s wife, girlfriend, daughter or sister, but I have a few farmer friends and neighbours. After lots of Googling and advice taking, we more or less came up to the following conclusions.

In order to make hay first you need some sunshine, so the fresh grass can dry correctly… which is a rarity in this part of the world and this time of year. Moreover, you need at least a good ten consecutive days of sunshine. If you live in the UK, you’ll know as well as me what a crap summer we’ve had, hence why this haymaking business happened in September and not in July.

In our naivety, we did not apply any fertiliser (understand dung), which turned out to be in our favour. You see, the more and the longer you let the grass grow, the stalkier it gets, as all the energy and the goodness in the grass is then used to produce flowers and seeds. So you would want to cut your grass before it reaches that stage, so it keeps most of its nutritious contents.

LAYP Good hay (left) Stalky hay (right)
Good hay (left) Stalky hay (right)


If we had applied fertilisers, this would have accelerated the growth of the grass and would have resulted in very below average hay if cut that late in the season.

Ideally, you would want a good two or three days of dry weather before you can cut your grass, so there is not too much water in the grass itself, but also in the ground (if you cut it 24 hours only after the last rain, the roots will still be absorbing the water that’s in the ground). Then you need to make sure you have at least four or five days of dry weather (and ideally very sunny and a bit windy) after you cut your grass, so it can dry. You’re looking to achieve a moisture content of below 20%, so it doesn’t rot in storage (and you also avoid dangerous rises in temperature when stacked, which can cause fires). In July, due to the longer daylight hours, the grass will probably dry quicker. The problem in September is not only reduced daylight hours, but also the dew in the morning, which is present until at least mid to late morning. So the grass may require an extra day or two to achieve the same level of dryness.

LAYP Turning hay using a tether
Turning hay

In any case, you have to turn the hay at least once if not twice a day during the drying process, to make sure as much of the cut grass as possible is exposed to the sun. If those days are windy, even better!

Look out for the next rainy day, and make sure your hay will be baled in taken in before that, otherwise all your hard work will be wasted.

So we watched and watched the weather in August, but it was never dry more than four days in a row. And then the opportunity came early September. Taking the few points above into consideration, it was now or never. So we cut the grass last Sunday, turned it everyday day and watched it gradually turn into this lovely pastely green colour. By Thursday morning we had hay. Although it could have done with an extra day drying, rain was forecasted for Friday evening, and so we couldn’t wait any longer. In all fairness, if it hadn’t dried by now, an extra day wouldn’t have made a lot of difference…

We baled it Friday afternoon (not lunchtime as originally scheduled, the baler having given us a fair amount of grief…), as the skies turned a very dark grey… we’d only baled a few when it started to rain… Our hearts sank, there was no way we would be quick enough, it was all wasted!! Luckily the spell was short-lived and did not go past the drizzle stage. Phew! We resumed work at pace and got the last bale in by 7pm, just as the real rain drops started to fall. Victory!

LAYP small hay bales
Small hay bales

All in all, there are about 250 bales, which for a field between 2 and 3 acres in size, isn’t bad… No pesticides, no fertilisers, completely organic. No money exchanging either as we did most of the work ourselves, and “hired” the machinery by trading favours. It is a lot of hard (hard) work and takes a lot of time, and all things considered, we would have probably been better of buying it…

But that’s not exactly the point though, is it… ๐Ÿ˜‰

“Make hay while the sun shines” Never up until now realised how true this is.

And God bless the neighbours.

Brox ย ย ย ย  x